This page is for anyone buying a vacuum sealer for a home kitchen, whether it is the first one or a replacement for a machine that no longer seals well. It comes down to three things: how often you cook, whether you seal liquids, and how much counter space you will give up. Work through the profiles and the table, and you will know which category fits, which bags it needs, and what to check before you pay.
As an Amazon Associate I earn from qualifying purchases.
Find your profile first

Most buyers get stuck comparing machines from different categories, which makes the choice harder than it needs to be. Pick the closest description, then compare inside that group.
- You live alone or as a couple. You cook a few times a week, freeze leftovers, and want to stop throwing away half a package of meat. A compact external sealer is the sensible starting point: it handles solid portions, takes up little space, and does not need a dedicated corner of the kitchen. Our FoodSaver Everyday review covers one model built for exactly this brief.
- You cook for a family. You buy larger packs, freeze in portions, and work with a freezer that is already crowded. Look for a wider sealing bar, roll storage, and a double seal. Bag width and lid clearance matter more here than the number of preset modes.
- You meal prep or cook in batches. You portion cooked food, sauces, and stocks, and you want the same result every Sunday. Moist mode, a drip tray, and a vacuum you can stop manually are the features that keep liquid out of the pump. If soups and braises are a regular part of the rotation, a compact chamber sealer removes the workaround entirely, and the Avid Armor USV20 review shows what that looks like in a home kitchen.
- You sell what you make. You portion spices, coffee, cheese, or prepared food for sale, and the machine runs several times a week. Prioritize parts availability and easy cleaning over design, and read the commercial category before settling on a home unit.
Como asociado de Amazon, gano por las compras que califiquen. Esto no cambia el precio que pagás. Más información
If two profiles fit, let the busiest day of your week decide: the machine that gets used is the one that adds no steps.

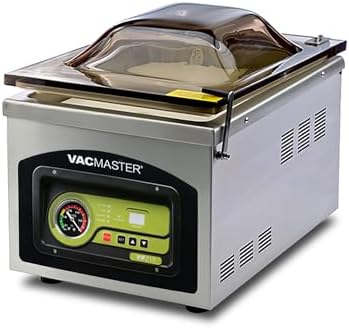


The four categories at a glance
The table compares categories, not brands. Use it to narrow the field: once you know which row is yours, compare specific models inside that row.
| Type | Best for | Level | Bag type | Liquids | Typical investment |
|---|---|---|---|---|---|
| Handheld | Small kitchens, travel, resealing dry goods | Beginner | Valve or zipper bags made for the unit | No: solids and dry goods only | Low |
| External (suction) sealer, entry level | Occasional cooking, leftovers, freezing portions | Beginner | Embossed bags or universal rolls | Limited: moist mode or freeze first | Low |
| External sealer with moist mode and double seal | Weekly cooking, batch prep, some sauces | Intermediate | Embossed bags, rolls, and accessory containers | Yes, with a drip tray or moist mode | Mid |
| Compact chamber sealer | Daily cooking, sous vide, stocks and braises | Intermediate to advanced | Smooth chamber bags, in several thicknesses | Yes, with no workaround | High |
The Typical investment column is a relative tier within each category, not a price. Actual prices are set on each product listing and change over time, so compare tiers first and listings second.
What the table cannot tell you is how loud a machine is, whether the lid closes with one hand, or whether replacement parts will still exist. Those answers live on the listing and in the reviews. If two rows work, take the simpler one: a well-sealed external sealer covers more ground than a chamber machine you avoid cleaning.
Eight features worth checking before you buy
Price and finish are what everyone looks at first, and what matters least after a month. These eight points decide whether the machine earns counter space or ends up in a cabinet.
1. Ease of use
The best home units do vacuum and seal with one touch, and show the stage of the cycle with a light or a short tone. If a machine needs two hands, a held lid, or a sequence you have to remember, you will use it less often. Watch a full cycle on video before you decide.
2. Size and footprint
An external sealer needs clearance for the lid and room for the bag to lie flat while it seals. A chamber unit is heavier and stays where you put it. Measure the counter and the cabinet, and decide whether it gets a permanent spot: a compact model that stays out beats a larger one you have to unpack.
3. Seal modes
Dry, moist, and gentle settings are not marketing filler: they change how much vacuum the pump pulls and how long the heat bar stays on. A moist setting stops liquid from being drawn into the channel, and a gentle or pulse setting lets you stop before soft food is crushed. Manual vacuum control is what cooking enthusiasts miss when it is absent.
4. Bag cutter
Many models include a sliding blade, and not all of them cut cleanly. A ragged edge is where leaks start, because the heat line cannot close over a torn surface. Scissors work, but a cutter that cuts cleanly saves a step on every bag. Test it on a roll before you commit.
5. Roll storage
An internal compartment for the roll keeps the bag material flat, stops it from unspooling in a drawer, and shortens the walk between cutting and sealing. It decides whether you cut a fresh bag or reach for a zip-top one.
6. Bag compatibility
Some brands require their own bags and containers; others take generic embossed rolls. Proprietary bags are not automatically worse, but they tie the running cost to one supplier. Before you buy, check what a roll costs, how often you replace it, and whether your size is easy to find. That recurring line is the real budget.
7. Suction and double seal
Complete air removal is what separates a vacuum seal from a folded bag: any air left inside becomes frost and then freezer burn. A double seal lays two heat lines instead of one, so a fold or a weak spot in the first line does not end the bag. It matters most for large bags, wet food, and anything frozen for months.
8. Cleaning
Residue collects in the suction channel and the gasket. A removable drip tray or a channel you can wipe out in a few seconds makes the difference between a machine that gets cleaned and one that slowly loses suction. Check that the sealing bar lifts out or wipes clean, and that the gasket is replaceable.
What you can seal, and what you should not

The usual assumption is that these machines are for meat. They handle almost anything that fits in a bag and survives the suction.
- Raw or cooked meat, poultry, and fish, portioned for the freezer
- Cheese and cured meats, so they do not dry out or pick up fridge odors
- Blanched or already-cooked vegetables
- Bread and baked goods, frozen rather than left in a bag on the counter
- Nuts, coffee beans, flour, rice, and other dry goods
- Soups, stocks, and sauces, with the technique below
- Prepared meals and weekly portions
- Herbs and spices, in small bags
- Marinades, in the bag with the meat
- Non-food items: documents, emergency clothing, a small tool kit
The liquids problem
Sauces, soups, and marinades are where most people give up on an external sealer. The pump pulls air through the opening, and liquid travels with it: the channel fills, the seal fails, and cleaning takes longer than cooking did.
The fix is mechanical, not technical. Fill the bag, leave it open, fold the open edge into a lip, and stand it in the freezer for about thirty minutes. Once the contents are semi-solid, the machine pulls a vacuum without drinking the sauce. Seal, label, and return to the freezer. A chamber sealer skips this step because the vacuum forms around the bag rather than through it, which is why people who cook stocks regularly move up a category.
What does not improve under vacuum
Two categories are worth naming. Raw vegetables keep respiring after harvest, and sealing them without blanching can create the conditions for fermentation and off flavors. Soft foods — fresh bread, ripe berries, pastries — collapse under suction; freeze first, then seal.
Six habits that prevent wasted bags
Almost every failed seal traces back to one of these six things.
- Freeze liquids before sealing. Thirty minutes in the freezer, bag folded with the opening up. This one habit removes most failed seals.
- Marinate in the bag. With the air gone, the marinade sits in direct contact with the surface instead of pooling at the bottom, and flavors move in faster than in a covered dish.
- Reuse a bag only when it is safe. A bag that held dry goods, bread, or clean vegetables can be washed, dried, and used again. Skip reuse after raw meat, fish, or oily sauces; the residue is a food-safety problem, not just a smell.
- Label and date every bag. Contents and date, written on the plastic above the seal line. A freezer full of identical white packages is how good food gets thrown out.
- Cut the bag to the food. A margin of two to three inches above the contents is enough to seal cleanly. Extra length wastes material and freezer space.
- Store flat, sort by category. Freeze bags flat first, then stand them upright like files. Group by protein, vegetable, and ready meals so you open the door once instead of four times.
Bags: types, rolls, and storage

The bag is half the system. A good machine with the wrong bag performs like a bad machine.
The four bag types
- Precut bags. Ready to seal, uniform, and fast. Best if you portion the same sizes every week.
- Rolls. You cut to length, which suits odd shapes and large items. Seal one end before filling.
- Embossed or channeled bags. Required for external sealers: the texture creates the path the air travels along. Smooth bags will not work in these machines.
- Smooth bags. For chamber sealers only, where the vacuum surrounds the bag and no channel is needed.
Storing bags and rolls
Keep rolls and precut bags in one container next to the machine, not in a drawer across the kitchen. A vertical box with dividers, a drawer insert, or a cardboard tube for partial rolls all work. Keep three sizes ready — small for spices, medium for portions, large for family meals — and refill in one pass instead of hunting mid-recipe.
Which profile fits which machine

The same decision, organized by household.
| Household | What matters most | Category to start with | Watch for |
|---|---|---|---|
| One or two people | Small portions, low volume, limited storage | Entry-level external sealer, or a handheld for dry goods | Paying for capacity you will not use |
| Family of four or more | Volume, batch cooking, freezer space | External sealer with double seal and roll storage | Bag width and lid clearance |
| Cooking enthusiasts | Control over the vacuum, delicate foods, marinades | External sealer with manual control; chamber for liquids | Preset modes that cannot be overridden |
| Travelers and campers | Portability, no counter space needed | Handheld or compact external unit | Bag availability away from home |
| Small food business | Continuous use, cleaning, parts | Compact chamber sealer, then the commercial category | Service and replacement parts |
Frequently asked questions
Does a vacuum sealer actually keep food longer?
Yes, for most foods. Removing air slows the growth of the organisms that spoil food and prevents freezer burn, which is oxidation rather than spoilage. It does not sterilize anything, so refrigeration and hygiene still matter.
How long does vacuum-sealed food keep?
Longer than the same food stored in a bag or container, but there is no single number: it depends on the food, the temperature, and handling before sealing. Use the storage guidance published for each food — the USDA and FoodSafety.gov charts for meat, poultry, fish, and leftovers — rather than a multiplier printed on a box.
What kind of bags do I need?
Embossed or channeled bags for an external sealer, smooth bags for a chamber sealer. Precut or roll is a matter of preference. An ordinary kitchen bag has no air channel and will not seal in either machine.
Can I seal liquids?
In a chamber sealer, directly. In an external sealer, freeze the liquid until it is semi-solid, then seal. A handheld unit is not built for liquids at all.
Is it difficult to learn?
No. Most machines run vacuum and seal with one button, and the technique that takes practice is filling and positioning the bag, not operating the machine. Two or three sessions make it routine.
What maintenance does it need?
Wipe the sealing bar and the area around the gasket after each use, empty and rinse the drip tray if you sealed anything moist, and let everything dry before closing the lid. When seals start failing, the gasket or the heat bar is the usual cause, not the pump.
Where to go next
If you landed on a compact external sealer, start with the FoodSaver Everyday review and check the bag format and footprint. If liquids are why you are shopping, the Avid Armor USV20 review covers a chamber unit sized for a home kitchen.
Either way, buy the machine for the week you actually have. The best sealer is the one you reach for on a Tuesday.